Bringing manual and automated tests together to deliver combined reporting and traceability is an important goal for many QA teams. Usually this means linking an automated testing process into a manual test tracking tool. With the new 9.9 release of QAComplete and release 10.0 of TestComplete implementing an integrated solution becomes possible without investing vast amounts of money or lots of time and effort.
In this post we’ll be looking at how to setup QAComplete and TestComplete integration. Then we’ll see how this can really benefit your QA efforts as we look at combined reporting and traceability in the follow up post.
The high level architecture here revolves around having a central test management capability (delivered by QAComplete) and a distributed test automation capability (provided by multiple instances of TestComplete running on multiple hosts). The key being to install and configure a test agent on the TestComplete machines. These test agents then communicate with QAComplete to link both tools.
The first step in all of this is to setup these test agents on the TestComplete host machines. This is a 3 step process.
Step 1 – Setup a QAComplete User
From within QAComplete we need to setup a new user that will act as the account accepting all the automated test run results. This can be done from the Setup tab in QAComplete.
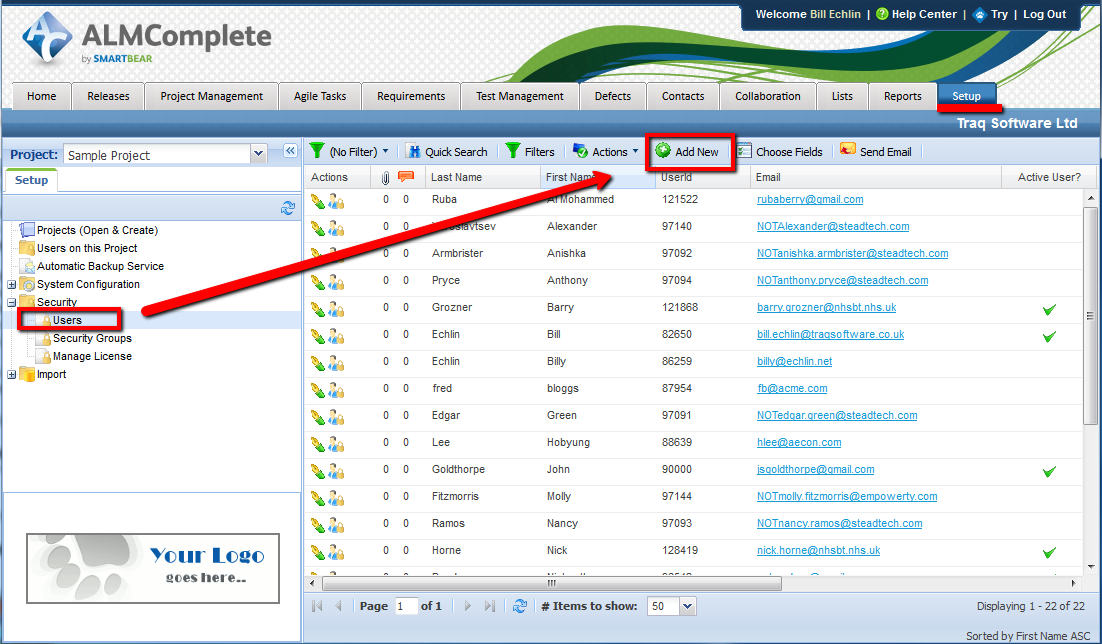
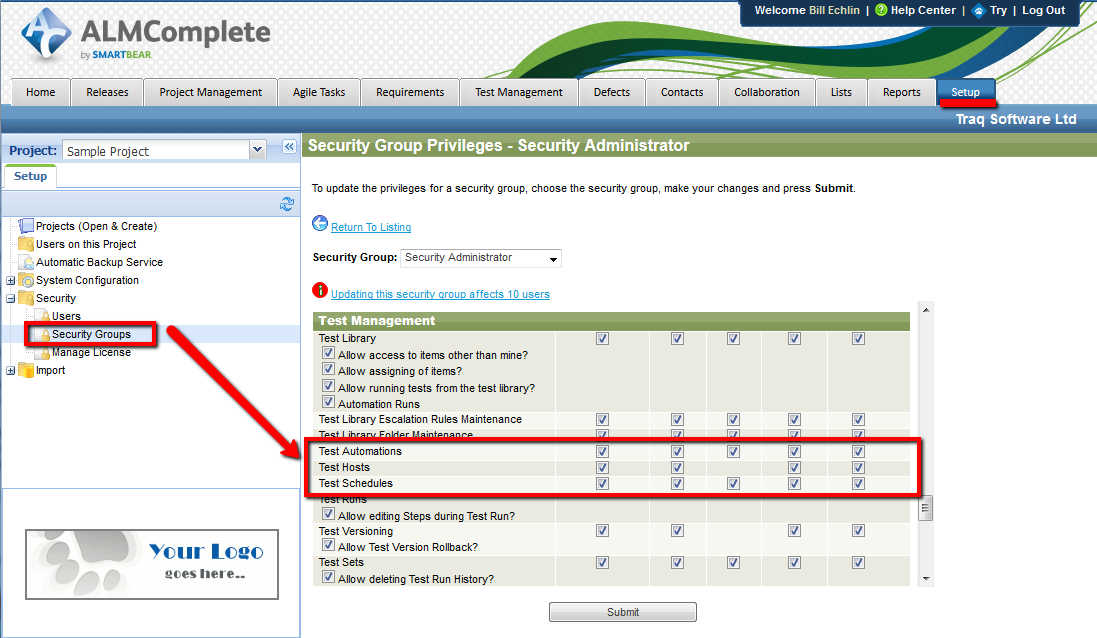
The important thing to remember here is that this user should be assigned to a ‘security group’ that has privileges for the following areas:
- Test Automations
- Test Hosts
- Test Schedules
This can be seen in this screen shot:
Step 2 – Install the Test Agent
From your TestComplete machine login to QAComplete with a browser and download the TestAgent.
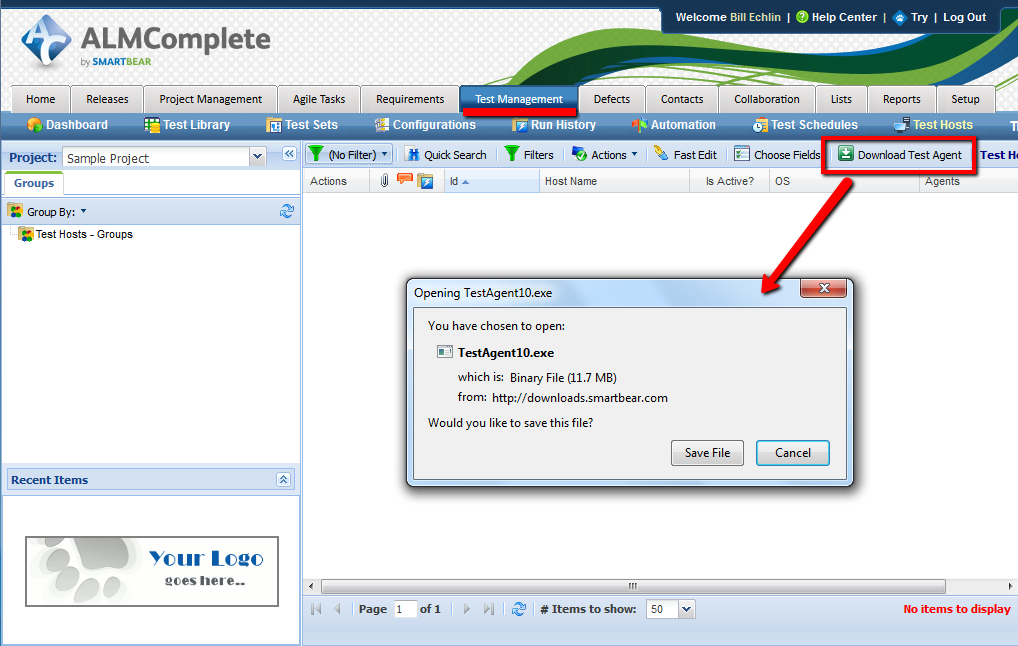
When you run the Test Agent installer you’ll be guided through a few dialogue boxes covering warnings and licence information. Once you’re past these you’ll hit the dialogue box that covers the connection settings to QAComplete:
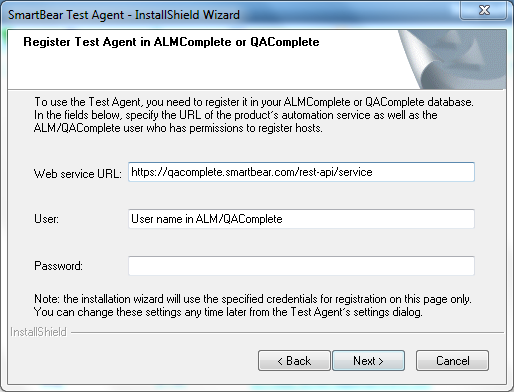
If you’re running with the SaaS QAComplete service then you’ll need to enter the following Web service URL:
SaaS Web service Url: https://qacomplete.smartbear.com/rest-api/service
If you’re running with your own On-premise install of QAComplete then your Web Service URL will be in the following format (clearly you’ll need to adjust this to point at your server)
On-premise Web service Url: https://qacomplete./rest-api/service
To make sure that your TestComplete client machine has access to the server you can just take this URL and paste it into the address bar in a browser.
https://qacomplete.smartbear.com/rest-api/service
You should see a list of the Rest Opperations:
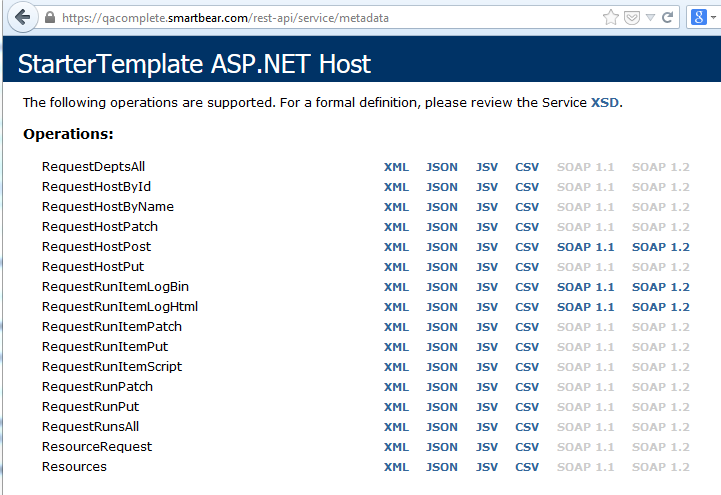
This proves that connectivity to the QAComplete server is okay.
Then enter the user and password that you created in Step 1. Note that the User should be the email address of the user you setup.
At this point when you click the next button the agent will attempt to check the connectivity and account that you’ve specified. If this succeeds you’ll get the next dialogue box that covers the windows account that the agent will use on this TestComplete host machine:
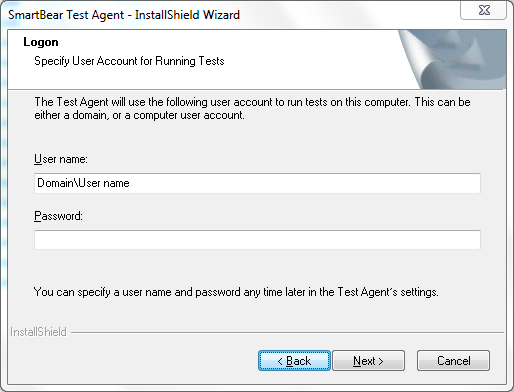
In here you’ll need to add the domain, user name and password you use to log in to Windows and run TestComplete.
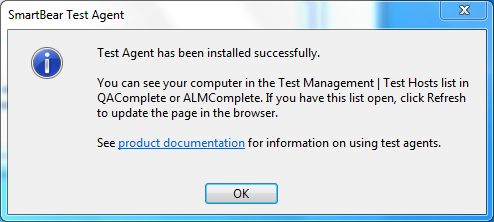
At this point the installer will configure and setup your new Test Agent. Once that’s finished your instalation should be complete and you’ll be presented with the completion dialogue box:
Step 3 – Check Hosts
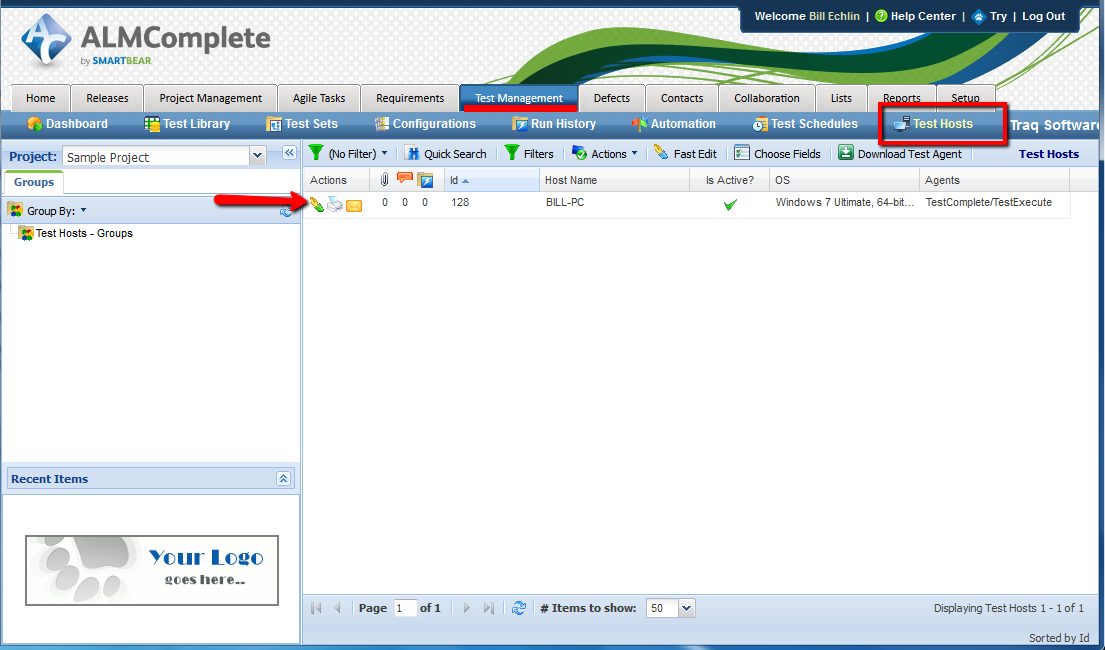
If you log into QAComplete now, select ‘Test Management’ and then ‘Test Hosts’ you should see your TestComplete host listed.
Now we’re ready to configure our host in QAComplete, setup TestComplete and start running our automated tests. We’ll cover this in the next post.
Looking for help implementing a scalable and maintainable test automation solution? Talk to us about our Accelerator package.
Download the Pdf brochure here
 The important thing to remember here is that this user should be assigned to a ‘security group’ that has privileges for the following areas:

 When you run the Test Agent installer you’ll be guided through a few dialogue boxes covering warnings and licence information. Once you’re past these you’ll hit the dialogue box that covers the connection settings to QAComplete:
 If you’re running with the SaaS QAComplete service then you’ll need to enter the following Web service URL:
 This proves that connectivity to the QAComplete server is okay.
Then enter the user and password that you created in Step 1. Note that the User should be the email address of the user you setup.
At this point when you click the next button the agent will attempt to check the connectivity and account that you’ve specified. If this succeeds you’ll get the next dialogue box that covers the windows account that the agent will use on this TestComplete host machine:
 In here you’ll need to add the domain, user name and password you use to log in to Windows and run TestComplete.
At this point the installer will configure and setup your new Test Agent. Once that’s finished your instalation should be complete and you’ll be presented with the completion dialogue box:

 Now we’re ready to configure our host in QAComplete, setup TestComplete and start running our automated tests. We’ll cover this in the next post.
Looking for help implementing a scalable and maintainable test automation solution? Talk to us about our Accelerator package. Download the Pdf brochure here